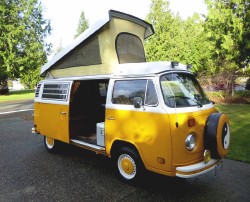
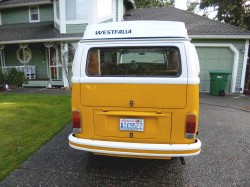
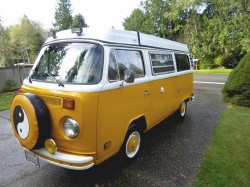
SAVING a 1976 VW Westfalia Camper
How it started:
For years, every time I visited my friend, I walked by a faded red VW camper with a flat tire sitting in the neighbor's driveway. In fact it had not been moved for 7 years as that's how long it had been since the owner had inherited the well used camper from his dad. Always believing that some day he might clean it up and use it but not having the means to accomplish the task, the reality was that the passing of time was quickly pushing the vehicle closer to being just a pile of rusty dust and his dream was dissolving even quicker.
I don't know why, maybe it was the pleasant memories I had about camping in a Westfalia I had in the Eighties or the empathy felt from seeing the slow and needless demise of fine German engineering year after year but one day in the summer of 2012, seeing the owner out getting his mail, I blurted out an overly generous offer to buy the beast which apparently was enough to overshadow the sentimental value to the owner. I had bought myself another project car.
What To Do:
The first order of business was to get it home. I replaced the rotted fuel lines, poured in some gas, borrowed a battery and crossed my fingers. It started right up. It wouldn't move because a rear drum was locked up but removing the wheel and smacking the drum with a sledge hammer, broke it free and appreciating the opportunity, I quickly drove it home while I could.
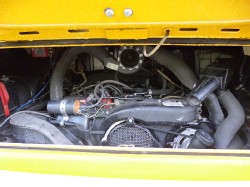
Now to check it out closer and see what needs to be done. A big concern of mine was the motor as parts for the type 4 motor can be expensive and I knew little about the VW fuel injection. Actually it ran quite well, especially with a motor with a few hoses either not connected correctly or not connected at all. At the time, I contributed the hoses as the reason it didn't idle well.
There were obvious areas of rust but to make sure I didn't miss anything, I decided to have the thing media blasted. All my other car projects were media blasted but they were body-off restorations. I found a place that could do it without taking the whole thing apart. I drive it down, they mask off all the windows, etc. , blast it, and I drive it home. Unfortunately, despite the best efforts of careful masking, media found its way into the engine compartment. After a lengthy attempt to clean out the compartment, it would not start and we towed it home.
At home I finally got it started by cleaning out the distributor, but it ran rough. I would deal with that later as the blasting had done its job and all the hidden rust areas had now been revealed. It all had to be fixed and my best friend, Bob Spencer, would take on the challenge of the body repairing and paint so I drove it to his house where it resided for a couple months going through reconstructive surgery.
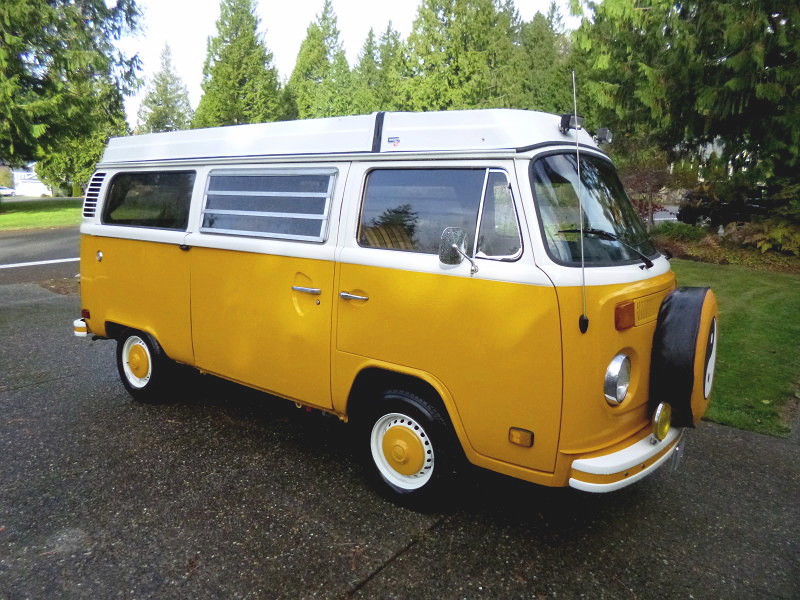
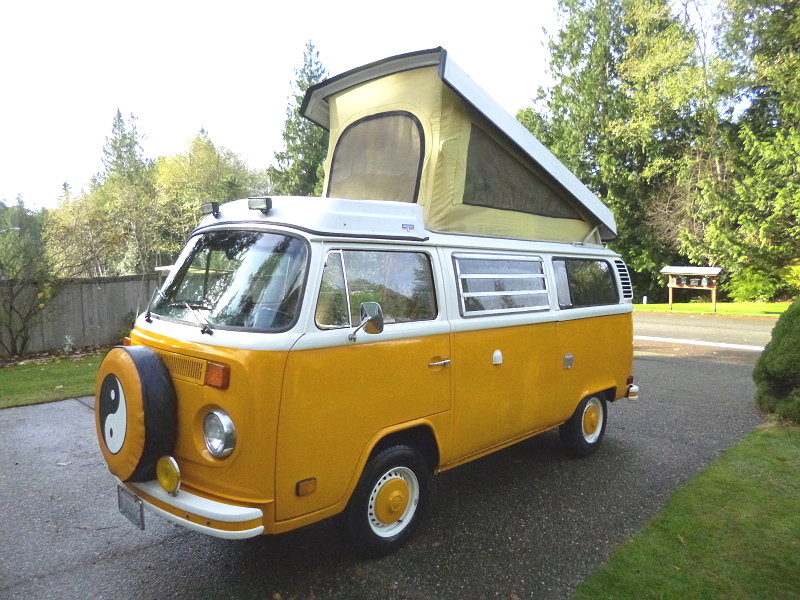
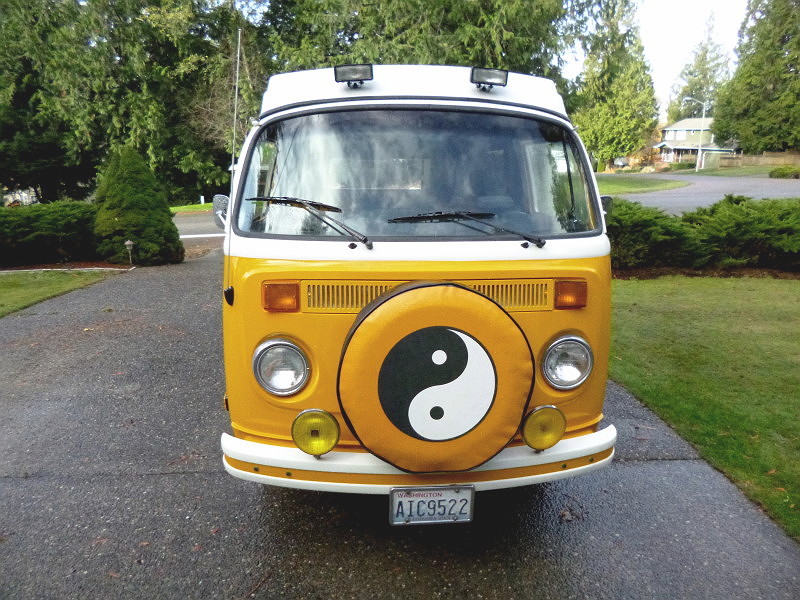
The pictures I've taken will document this process.
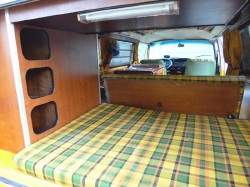
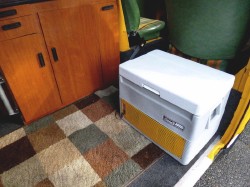
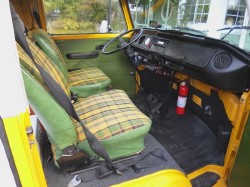
Interior Fun
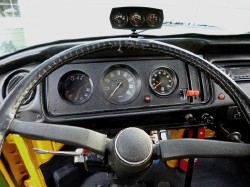
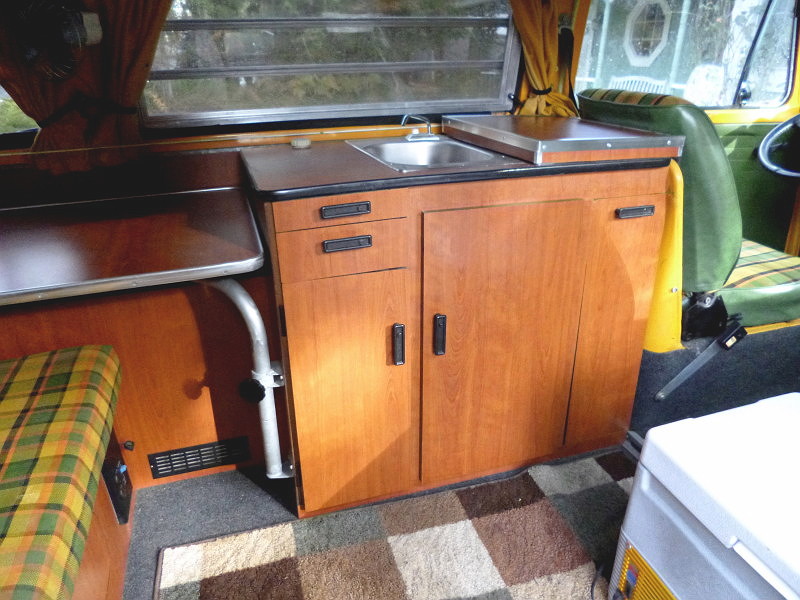
Once home again, I took on the interior. The dad who once owned it spent a lot of time with it in Mexico and the work done on it flickered between clever and ...ah......"unique". There had been quite a few modifications to the camper cabinets and the wiring, some requiring an exorcism, some that gave me a chuckle, and some that would require the scrutiny of the Discovery Channel to explain.
My favorites include the knife switch on the dashboard to turn on the headlights or high beams, the shelf (no sides) made of aluminum that replaced the glove box (on a hard turn the entire contents would slide off the shelf onto the floor), or the generous use of drilled pennies because they were cheaper than the 3 cents the hardware store wanted for a washer.
The cabinets were in disarray so had to be fixed or reconstructed and new matching Formica applied. Doing a little woodworking was a welcome detour from grease, paint, and corroded pennies.
The pictures on this page show the results of almost 15 months of work.
Although sometimes I would forget to take pictures, I've documented the restoration with hundreds of pictures which you may browse by clicking here......
Click on any picture to see full size